Note
This technote is not yet published.
This manual shows users how to change, add, or revert configurations of CSCs.
Note
This document is intended for operators of the Vera Rubin observatory control system. It consolidates information about how to handle CSC configuration and ancillary data. After reading this document users should know what to expect when interacting with system component’s configuration, how to select a configuration for a component and, be able to create and load new configurations.
Warning
The procedures in this documents are still under development. The functionality referenced here is not in place nor has it been agreed upon as the proper implementation. For the time being, this document should be considered a proposed implementation.
1 Introduction
The Vera Rubin Observatory control system is highly distributed, containing multiple components that must operate in consonant. In order to achieve reliable operation it is fundamental to guarantee that observers must be able to, at any point, identify what set of configurations a component is using, what sets are available to be loaded, and how to load the configuration they choose. During commissioning and engineering runs, users will also be interested in building, validating and verifying new sets of configurations.
The process of building new or modifying configurations will vary considerably for each component. In some cases, the configuration may be a simple set of host name and port that the component connects to. In other cases, the configuration may require the calculation of complex lookup tables (e.g. M1M3 and M2) or model coefficients (e.g. pointing component). These may require on-sky time for acquiring the data, and complex software to analyze and derive the configuration products. All of this data needs to be associated with this configuration in a way that is easily accessible and traceable.
In this tech-note we discuss the basic operational procedures involved in handling CSC configuration. The document begins with the most simple case of bringing a CSC up with a specific configuration, and eventually details how to updating and testing newly defined configurations.
For more technical details about how CSCs handle configuration, see tstn-017.
2 Configuration Interaction Use-Cases
Users will interact with configurations in multiple ways. In many cases, a user/operator will only need to change the configuration that is currently loaded and are not concerned with the contents of the configuration itself. This section illustrates example use-cases for these types of scenarios.
2.1 Discovering available configurations
The easiest way to get information from a CSC programmatically is by using a Jupyter notebook server. From a notebook, observers, developers and power users can easily interact with the system through Python.
In order to know which configurations are available for a specific CSC, users can read the configurationsAvailable event.
This is done using a salobj.Remote class.
from lsst.ts import salobj

domain = salobj.Domain()

atdome = salobj.Remote(domain, "ATDome")

await atdome.start_task()

config_available = await atdome.evt_configurationsAvailable.aget(timeout=5.)

# This will print the available labels.
print(config_available.labels)

# This will print the mapping between label and configuration files.
print(config_available.mapping)
Often, this can also be accomplished using a high-level class that is designed to interact with a group of CSCs.
from lsst.ts.observatory.control import ATCS

atcs = ATCS()

await atcs.start_task

config_available = await atcs.rem.atdome.evt_configurationsAvailable.aget(timeout=5.)

# This will print the available labels.
print(config_available.labels)

# This will print the mapping between label and configuration files.
print(config_available.mapping)
It is also possible to check this information by querying the EFD or through the CSC summary information interface on LOVE. Examples of how to do this using the LOVE interface will be added when the functionality is ready.
2.2 Selecting default configuration
In most cases, the control packages contain high-level commands to enable all components under their control, and select the default configuration in the process. An example of this is the ATCS.
from lsst.ts.observatory.control import ATCS

atcs = ATCS()

await atcs.start_task

await atcs.enable()
If working with an individual CSC, which as an operator would be a rare occurrence, default CSC configurations are loaded simply by transitioning the CSC via:
from lsst.ts import salobj

domain = salobj.Domain()

atdome = salobj.Remote(domain, "ATDome")

await atdome.start_task()

# CSC needs to be in STANDBY state for this to work
await salobj.set_summary_state(atdome, salobj.State.ENABLED)
2.3 Selecting a non-default configuration
Selecting non-default configurations via control packages is also possible.
A dictionary is used to override the appropriate configuration labels for each component that needs a non-default configuration.
This example assumes the component of interest is already in the STANDBY state.
from lsst.ts.observatory.control import ATCS

atcs = ATCS()

await atcs.start_task

# ATAOS must be in STANDBY state for this to work. All other CSCs will
# be configured with the default label
await atcs.enable(configuration={'ATAOS': 'constant_hex'})
Examples of how to do this using the LOVE interface will be added when the functionality is ready.
If working with an individual CSC, which as an operator would be a rare occurrence, the salobj.Remotes class may be more appropriate:
from lsst.ts import salobj

d = salobj.Domain()

atdome = salobj.Remote(d, "ATDome")

await atdome.start_task()

await salobj.set_summary_state(
atdome, salobj.State.ENABLED, configurationToApply="original-install"
)
2.4 Changing the default configuration
Changing the default configuration is a more involved endeavor because it entails making a change to the contents of the configuration repository. Because the repo is under version control, the appropriate steps must be taken. For this example, let’s assume we want to change the default configuration in the ATAOS, which is found in the ATAOS directory of the ts_config_attcs repo.
Create a JIRA ticket in where the title/description note the change being made. Let’s assume it creates ticket DM-12345.
Clone the repo and checkout a new branch
git clone git@github.com:lsst-ts/ts_config_attcs.git
git checkout -b tickets/DM-12345
Note that the branch name is the word
tickets/appended with the Jira ticket name.Open the most recent schema version (v2) and modify the contents of
_labels.yaml. For example, the original version may be:# Labels for recommended configurations; a dictionary of {label: config_file} default: _base.yaml constant_hex: hex_m1_202003_constant_hex.yaml
Say you wish to add a new configuration label called, m1_hex, and then make the constant_hex be the default. Because _base.yaml is always assigned the label of default, the contents of _base.yaml must be updated to include the contents of constant_hex. Then, m1_hex and the corresponding filename needs to be appended. Therefore, the file would become:
# Labels for recommended configurations; a dictionary of {label: config_file}
default: _base.yaml
hex_m1: hex_m1_hex_202003.yaml
Add, commit and push the changes, with a commit message.
git commit -am "Updated base configuration to use the configuration previously labeled constants_hex with a filename of hex_m1_hex_202003.yaml. Added hex_m1_hex_202003.yaml with label of hex_ml. See DM-12345 for more information."
git push
The commit message can add information about what changes are being made and a short description for the reason. It is also recommended to explicitly mention the Jira ticket for the work being done as the branch name is lost once the changes are merged to the head branch.
If this is a normal configuration change procedure, then create a pull-request (PR), and have it reviewed, merged and released.
Once the new configuration is released it can be made available to the component, which will not automatically see the newly created configuration. During normal operations this involves creating a new deployable artifact and updating the deployment to use the new configuration version.
On-the-fly changes are discouraged but sometimes a reality and are therefore discussed in 3 Creating a new configuration.
Once the component is re-deployed with the new configuration, bring it from
STANDBYto theENABLEDstate. No explicit specification of the configuration is necessary since the default is being selected. If a different label is used, theconfigurationparameter must be set in the command below (see 2.3 Selecting a non-default configuration).await salobj.set_summary_state(ataos, salobj.State.ENABLED)
2.5 Finding a previously used configuration
In the future, one may want to verify which configuration was being used for a given observation.
Because we often use generic labels (e.g. default), and file contents can change with time, creating a robust version controlled system must go beyond simply changing filenames.
For this reason, additional metadata is associated with each configuration, notably the url and version parameters in both the configurationsAvailable and configurationApplied events.
These parameters are key to ensuring that each configuration is unique, and is traceable to their filename and contents.
The url parameter simply contains a URL indicating how the CSC connects to its settings (meaning a link to the repository).
The version parameter is more complicated.
For all CSCs (except the camera?), the version parameter is a branch description[1] which is automatically generated and populated by the CSCs.
This is what is output by running the following command in a configuration repository (e.g. ts_config_latiss):
git describe --all --long --always --dirty --broken
| [1] | The option --broken was introduced in git 2.13.7 |
An example output is, heads/develop-0-gc89ef1a.
The repository branch (or tag) name forms the first part of the branch description.
This first part contain individual identifiers and can change rapidly.
It may take any form necessary to convey the appropriate information.
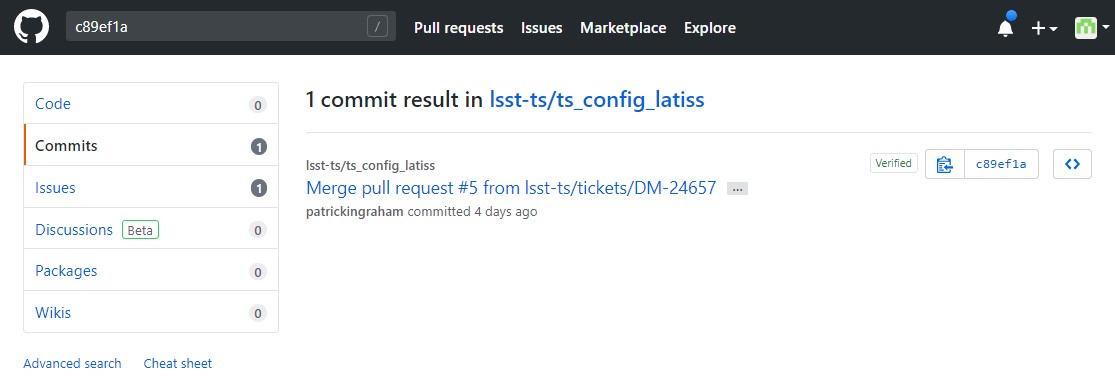
The last 7 characters (c89ef1a) is the hash of the commit of the loaded configuration file.
Users can find this commit by navigating to the repository on github, searching for the commit hash, then
clicking on the “commits” section of the search results, as shown in the screenshot below.

Figure 1 Using the version output in the configurationApplied event, it is possible to traceback the repo to the configuration that was loaded.
2.6 Exceptions
TBR.
3 Creating a new configuration
The process to derive new configuration parameters will vary considerably from component to component. In some cases, the configuration is simple enough that a change may involve simply replacing an IP or hostname value, a routine filter swap on an instrument or updating the limits to an axis range due to some evolving condition. On the other hand, deriving new parameters may involve generating complex LUTs that may require on sky observations and detailed data analysis.
Following is a detail of each step of the process to generate a new configuration and update it for CSCs written in salobj. For other components, see the exception section below.
Create a Jira ticket to track the work being done (e.g. DM-12345). If details or discussions are needed they can done using the Jira tickets itself.
git clone git@github.com:lsst-ts/ts_config_attcs.git
git checkout -b tickets/DM-12345
Execute the work needed to derive the new configuration parameter(s).
As mentioned above, in some cases, the process may be straightforward, consisting simply of replacing the values of a set of parameters with given values (e.g., swapping filters). In these cases, this step will be simply verifying any required work was performed and continuing to the next step. Jira should be used to track those activities.
The Jira ticket should also be used to track the work done on those cases where a more involved analysis is required, e.g., in dome and/or on sky data acquisition, EFD queries, data processing etc. Any ancillary software or data product required during this process should be properly managed using git. When working with Telescope and Site components, any software required during this process should be stored in a git repository in T&S GitHub organization, and should follow the standard T&S development workflow guidelines. This includes, but is not limited to, EFD queries, Jupyter notebooks, other data analysis routines (regardless of the programming language) and so on. The preferred location for storing Jupyter notebooks is the ts_notebooks repository.
Any intermediate data product(s) generated in the process should also be stored in the git Large File Storage or, if size permits, with the software repository itself.
Edit/Add/Replace the configuration file(s) or add a new file(s) to host the new configuration in the CSC configuration directory.
- Ideally the name of the file should reflect the purpose of change, dates can also be used as well. Old configuration files can be kept in the repo if they still represent valid configurations otherwise, they should be removed. Note, though, that they will still remain available on previous versions in the git repo, enabling historical comparison.
Add a (commented out) description in the file detailing where any auxiliary data may be stored, the Jira ticket number used to create the file, and the reason for creating the configuration, such as in this example, with the appropriate information.
Modify the configuration labels to either re-use a previous label to map to the new configuration (preferred) or create a new label for the new configuration.
- For Salobj CSCs, this is done by editing the
_labels.yamlfile.
- For Salobj CSCs, this is done by editing the
Add, commit and push the changes, with a commit message.
git commit -am "Add new LUTs for ATAOS (file 20200512-configuration.yaml) based on data taken on 20200512. Check DM-12345 for more information."
git push
Test the new configuration on the CSC. If this requires in-dome or on-sky testing, make sure the test is properly documented in a technote and/or Jira ticket. To make the configuration available on a running CSC check 3.1 On-the-fly changes.
Create pull request(s) (PRs), with evidence that the configuration is tested, verified and documented.
PRs must be created for all repositories that where modified during the process, including, but not limited to, the configuration repository, ancillary software and documentation.
The PRs will follow the standard review procedure. Once the they are approved, merged and released the new configuration becomes official and can be deployed.
3.1 On-the-fly changes
During the process of creating a new configuration (3 Creating a new configuration) or during a commissioning/engineering run, it may be necessary to make a new configuration available to a running CSC for testing without rebuilding/re-deploying the component. In these cases, the user should also create a Jira ticket (or work out of an existing ticket) to document the occurrence.
Following are the steps to make a new configuration available to a running CSC:
If the configuration is not already created and pushed to GitHub, follow steps 1 to 5 in 3 Creating a new configuration.
Make sure the CSC in in
STANDBYstate, which can be accomplished using the following command.await salobj.set_summary_state(ataos, salobj.State.STANDBY)
Login to the where the CSC is running. The procedure will vary depending on how the CSC is deployed. Most Telescope and Site components are deployed on containers using Kubernetes (k8s). For CSCs that are not running on a container, you should be able to login to the host machine with
sshand continue with the procedure (go to step 3). A provisory list of IPs can be found in confluence <https://confluence.lsstcorp.org/x/qw6SBg>. For details about the deployment system see the deployment documentation.The procedure to access containerized components is as follows:
Log in to the rancher service at https://rancher.ls.lsst.org. You will need special authorization to acquire an account on that service.
Warning
This service is responsible for managing the deployment of the entire system. Make sure you follow the procedure exactly. If you are in doubt about an operation make sure you verify it with knowledgeable personnel.
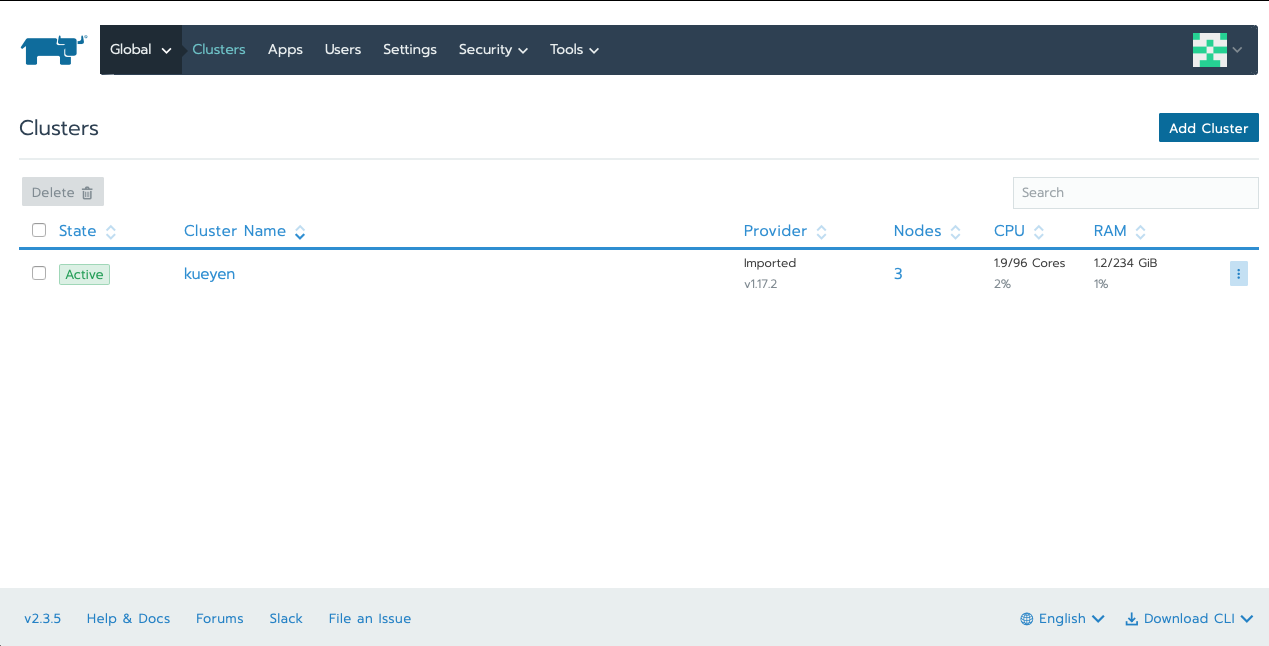
Once logged in, you will be presented with the list of available k8s clusters.

Figure 2 List of Kubernetes clusters. At the time of this writing, the only cluster available was kueyen, the commissioning cluster at the base facility in Chile.
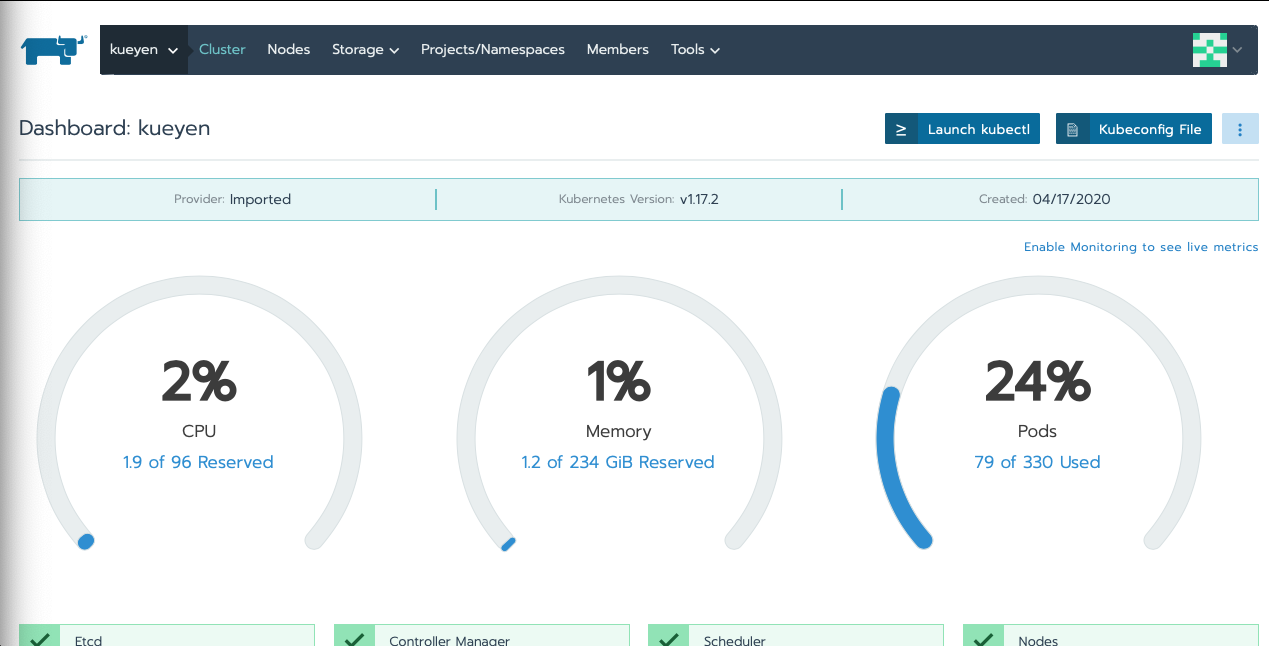
Click on the name of the cluster where the CSC you want to modify is running. If it is a summit operation, the name of the cluster will be
andes. After selecting the cluster, you will be redirected to the cluster dashboard.On the top right corner of the cluster dashboard, there is a button with
Launch kubectl. This will open an interactive session on you browser that will allow you to interact with the k8s cluster you selected. If you are knowledgeable about k8s you can also download theKubeconfig fileand login to the cluster from your own computer.Warning
Do not download the
Kubeconfig fileunless you really know what you are doing. This file contains access and credential information that would allow users direct access to the k8s cluster.Once you select
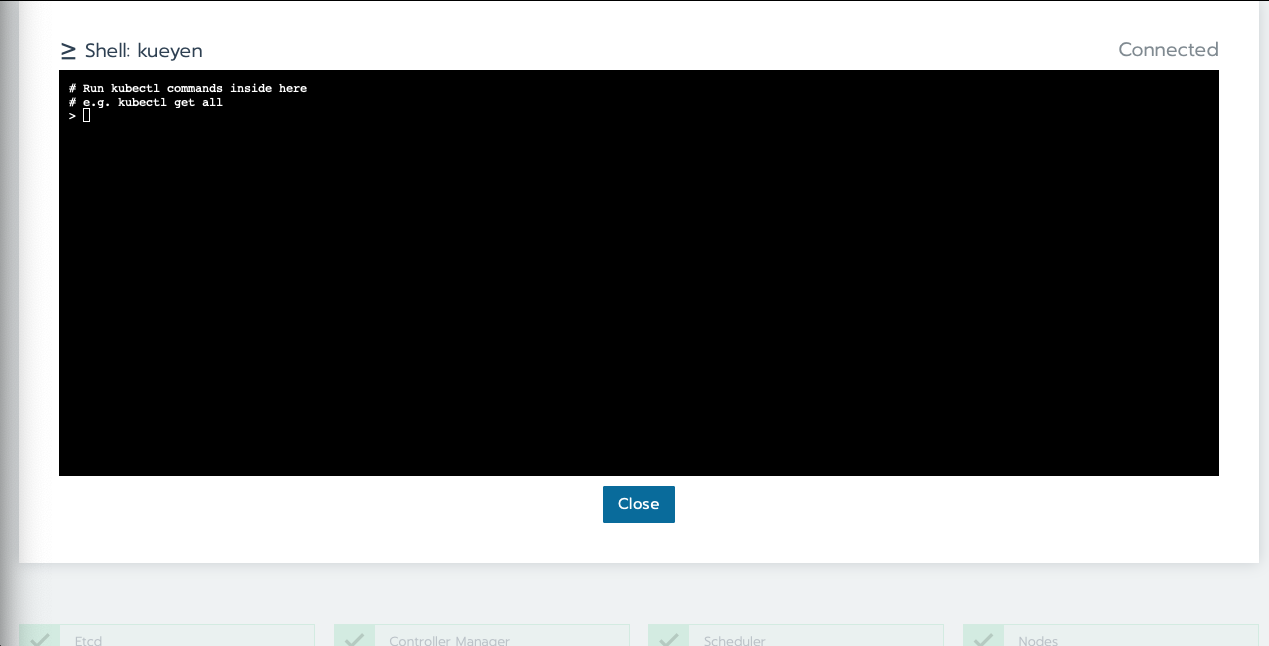
Launch kubectlyou will be redirected to a Shell connected directly to the selected k8s cluster.Use the following command to discover the container running the CSC :
kubectl get pods -n cscsThis will list all the CSCs “pods” which are, basically, the running containers. The name of the CSC will be part of the pod name and should be easy to identify.
Connect to the running pod:
kubectl exec -it -n cscs <pod-name> -- /bin/bashMake sure to replace
<pod-name>with the name of the pod for that CSC.
Once inside the CSC host, go to the location where the configuration is installed. This information can be found in the CSC documentation or in the deployment documentation. You should be able to use regular linux command line commands (e.g.
lsandcd).Once in the configuration package, update the git repository and checkout the branch with the new configuration:
git fetch --all
git checkout -b tickets/DM-12345
Once the branch is updated you can re-enable the component to load the new configuration.
await salobj.set_summary_state(ataos, salobj.State.ENABLED)
The version attribute in the configurationsAvailable event would reflect that change with something like:
version: heads/tickets/DM-12345-0-g79e2257
Note that it would be possible to track the configuration in the future, even if the branch is removed from the repository, by using the commit hash (g79e2257).
3.2 In-line changes
During commissioning, we anticipate that there will be situations where quick configuration changes need to be implemented and tested. In these cases, working out of a local branch and going over the 3.1 On-the-fly changes process may result in the loss of on-sky time. To ensure the work/changes is tracked it is still recommended that the user create a Jira ticket (or work out of an existing ticket) to document the occurrence. Then, instead of checking out the repository locally, the user can work out of the deployed CSC configuration directly in the host.
To do this, perform the following procedure:
Verify (or transition) the CSC in in
STANDBYstate.await salobj.set_summary_state(ataos, salobj.State.STANDBY)
Login to the where the CSC is running. The procedure will vary depending on how the CSC is deployed. For containerized components, you can find details on how to do that in the deployment documentation.
Once inside the CSC host, go to the location where the configuration is installed. This information can be found in the CSC documentation or in the deployment documentation.
Create a local branch to work on.
git checkout tickets/DM-12345Use the available text editors (
vimandemacsare usually made available) to edit the configurations.Once the configurations are edited and saved, re-enable the component.
await salobj.set_summary_state(ataos, salobj.State.ENABLED)
It is important to create a branch in place to work on and, later, commit-push to the repository and continue with the process afterwards.
Warning
Users must be aware that failing to commit-push changes done in line may result in loss of information and traceability. Therefore, this procedure should be reserved only for critical situations.
Transient labels with Jira ticket numbers may be used for developing new configurations. They should be moved to standard type labels at the earliest opportunity.
Note that when you connect to the computer running a CSC and edits the configuration directly, the version parameter reflect that change with something like:
version: heads/tickets/DM-12345-0-g79e2257-dirty
When this happens, it prevents us from precisely identifying what configuration was used. In this case, the preferred solution is to use 3.1 On-the-fly changes to ensure traceability is not lost, at the expense of a couple extra minutes.
3.3 Exceptions
The following require different procedures to create/modify a configuration
4 Appendix I: Configuration location for CSCs
Note
This appendix will contain a table relating the CSC to the location of its configuration repository
5 Appendix II: Updating Deployed CSCs
Important
Needs completing. Might be better to have this as a separate document.
6 Appendix III: Updating Control Packages
TBD
7 Appendix IV: Creating Configurations for non-salObj CSCs
This appendix details the require procedures to produce configuration files for specific CSCs.
7.1 Pointing Component
The pointing component has a configuration file that resides with the code base which, in itself, also defines a couple different files (e.g. pointing model).
Nevertheless, the CSC is not developed to be a configurable CSC, meaning it does not accept a configurationToApply value to switch between different configurations and does not output the required events.
The CSC is being developed by Observatory Sciences using C++.
Important
PROCEDURE TO BE ADDED
7.2 M2
Important
PROCEDURE TO BE ADDED
7.3 ATMCS and ATPneumatics
Important
PROCEDURE TO BE ADDED
7.4 Non-Configurable CSCs
Some CSCs will not be configurable at all.
Examples are sparse in our current architecture but, the from Salobj point of view, a CSC can be developed on top of a BaseCSC which makes it a non-configurable component.
A non-configurable CSC will ignore the configurationToApply attribute of the start command, as it does not contain any true meaning to it.
Likewise these CSCs will not output any of the configuration-related events.
Important
LIST NON-CONFIGURABLE CSCs
References

